
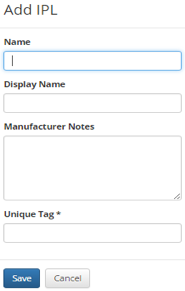
To create an IPL manually, select the IPLs tab associated with the model or chapter. Click on the Add IPL icon, and supply the name and display name.
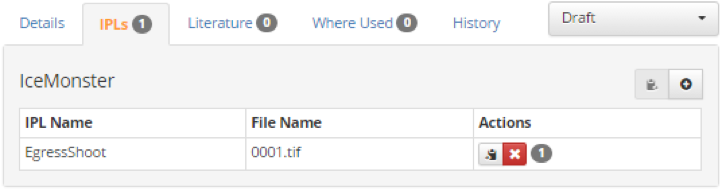
In this case, the workflow state will be inherited from the model or chapter to which it is attached. Adding an IPL to a model will change the state to Draft from the Publish or Ready to Review state.
When an IPL is created using this method, you can add an image using one of several options:
- Select an image that is in use elsewhere that could also be used for this IPL.
- Select a new image to upload and associate with this IPL.
- Cancel and select an image later.
The parts list can be hand entered or copied and pasted from a spreadsheet or delimited text file.
When the image and parts list have been created, hot spots can be created on the diagram and linked to parts on the parts list by clicking on the tool bar icon for hot spotting mode. Clicking once on the diagram to establish one corner of the hotspot and then clicking a second time where the opposite corner is desired will establish the hot spot area. Once the area has been established, the OCR tool will offer its best guess at what number should be associated. This can be modified, and the hot spot area can also be modified.
Creating IPLs by this method for whole catalogs may not be feasible unless the number of models and associated IPLs is small. Normally, this information is imported in bulk. You will typically import all IPLs associated with a model at once. It is even possible to import IPLs for multiple models at a time.